How to bake your own bred
Intro
Ok, so you're stranded somewhere and there is no access to good Rye Bread as you know it from home and now want to make a virtue of necessity or just want to know how it is done.
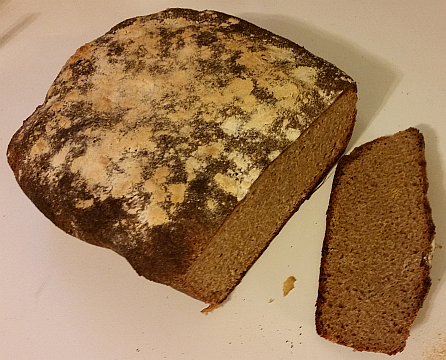
That was my situation. After four years of exile in the United States, getting a loaf only once in a while from Canada, the american foam-bread turned so sour on me and I decided to make my own bread. As a practical joke I published a picture of a fresh cut loaf one day. Shortly after that, I was asked for samples and the recipie. Well, here we go, here is my help yo help yourself.
Overview
To bake with rye, you need Sourdogh. If you don't have it, there is a rather easy way to get it. It is not a kind of rocket science but just takes some time. Here is a tutorial.
This recipie is rather easy: on one day you prepare a sponge (takes about five minutes) and on next day you make the dough (takes about 20-30 minutes) and bake the bread. Inbetween you have a lot of time to do different stuff.
If you're interested in the chemistry behind sourdogh (and understand German), please enjoy this video clip on Youtube.
Sponge
When I bake, I always start with the sponge (pre-dough). That's usually done on a Friday night.
Ingredients
- 12.5 oz. (350g) Rye flour (available at Meijer's for a less than outrageous price.)
- 5.3 oz. (150g) Sourdough
- 14 fl. oz. (400ml) warm water
Preparation
Mix ingedients toroughly, cover it and let it rise for 10 to 12 hours. I usually put it in the (turned off) stove. Ich stelle das meistens in die ausgeschaltete Backröhre.
I've been told to use glass, ceramic or plastic bowl and to avoid metal ones. They said it is better for the microbes and bacteria. My personal guess is to avoid stains and discoloration on the metal due to the lactacid.
Hauptteig
A real bakerman will probably cry on the way I prepare the dough in just two steps. But hey, this is for rookies and wannabees like me.
Saturdays, after breakfast I start the main process. The bread will be done on afternoon, just in time for a Brotzeit.
Ingredients
- the sponge
- 23oz (650g) weath flour, I prefer whole weath.
- 12.3fl. oz. (350ml) warm water
- 0.7oz (20g) sugar
- 0.9-1.0oz (25g-30g) salt
Preparation
Turn on the light in the stove for having goof conditions for the yeast. Usually I heat up a cup of water in the microwave and put it in, too.
Set aside 5.3oz (150g) of the sponge and put it in the fridge. Do not close it air tight, humididy must be able to get out. Also, it must not dry out. I put a piece of kitchen towel between container and lid. This is your Sourdogh for next week.
Add all ingredients to a mixing bowl and mix for about 10 minutes. The dough is "good" when the surface turns silky and matte and it starts to form a ball on the kneading hooks.
Attention. Every flour absorbs different quantities of water. If the dough is to dry and the mixer is getting overworked: add water! Just make sure it does not morph into a dough for pancakes
Eine große Kastenform mit Backpapier auslegen und den Teig hinein geben. (Meine Form ist 20cm x 20cm x 5cm. Ideal wäre eine mit dieser Grundfläche aber 8cm hoch.) Mit dem Teigschaber verteilen, evtl. Sonnenblumenkerne, Kürbiskerne o.ä. auf dem Teig verteilen und andrücken. Bestreicht man den Teig vorher mit Eiklar, bleiben die auch beim Schneiden an Ort und Stelle. Ansonsten, für die Optik, einfach etwas Mehl auf dem Teig verteilen.
Für vier bis fünf Stunden in die Backröhre stellen und gehen lassen.
Der Teig sollte jetzt aufgegangen sein und knapp das Doppelte an Volumen haben.
Den Teig in der Mikrowelle zwischenparken, während der Backofen auf 500F vorheizt.
Für 30-35 Minuten bei 500F backen, je nach dem, wie viel Kruste man möchte.
Ofen auf 350F herunterdrehen, nochmal 10-15 Minuten backen bis die Gesamtbackzeit von 45 Minuten (YMMV - ausprobieren) erreicht ist. Den Ofen während des Backens nicht öffnen. Keine Sorge, das Brot verbrennt nicht, auch wenn es so aussieht.
Raus nehmen, Papier abziehen und auf einem Rost abkühlen lassen. Der fertige Laib wird ca. 1500g wiegen.
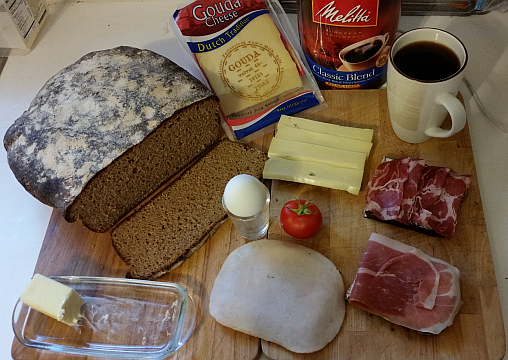
Guten Appetit
Frisches Brot, leckerer Belag und eine Tasse Kaffee. Ein Sonntag kann so gut beginnen, auch wenn man fern von Zuhause ist.
Dreistufige Teigführung
Wie oben schon geschrieben, der Bäcker würde den Teig noch anders handhaben. Nach dem Mischen der Zutaten wird er nälich eigentlich in einen Gärkorb gegeben. Das ist ein Korb aus Rattan, üblicherweise mit einem Leinentuch. (Suchbegriff für die Elektrobucht: "Proofing Basket")
Darin bleibt der Teig eine Weile, die sogenannte erste Ruhezeit. Dann stülpt man das um und wuerde jetzt erst die Deko aufbringen. Der Laib bleibt dann noch eine zweite Ruhezeit liegen, bevor er in den Ofen kommt (Fachbegriff: der Laib wird "eingeschossen".)
Ich habe damit aber nie gute Erfahrungen gemacht. Erstens fällt mir der Laib beim umstülpen immer etwas zusammen und zum zweiten gaht er in der zweiten Ruhezeit immer mehr in die Breite als in die Höhe. Das gab dann immer eher flache Brote. Ich bin dann zu der zweistufigen Teigführung über gegangen und erhalte die Resultate, die ich mir erhoffte.
Falls jemand einen Hinweis hat, wie das besser geht: immer her damit. Es ist zwar "gut genug", aber besser lehne ich auch nicht ab.